[av_one_full first min_height=” vertical_alignment=” space=” custom_margin=” margin=’0px’ padding=’0px’ border=” border_color=” radius=’0px’ background_color=” src=” background_position=’top left’ background_repeat=’no-repeat’ animation=” mobile_display=”]
[av_textblock size=” font_color=” color=” admin_preview_bg=”]
 The web is primarily a visual medium.
A picture is worth a thousand words!
So what can you do to augment your written work with some meaningful visuals? Well, it’s as easy as 1, 2, 3.
[/av_textblock]
[/av_one_full]
[av_textblock size=” font_color=” color=” admin_preview_bg=”]
Three Steps To Success
- Pay Attention To Size
- The “Current Photo” for your Profile is presented in a window that’s only 161 pixels wide.
- Images embedded in any text block normally look best in the 300-pixel-wide range.
- This website won’t allow pictures bigger than 2 megabites to be uploaded.
- So, if you have a large photo, the best thing you can do is crop it to show the most interesting parts and then resize it.
- Resize it to be about 160-200 pixels wide for the Current Photo in your Profile, and something between 200 and 600 pixels wide for use in any text block with an “Add Media” button above it.
- If you don’t have photo editing tools, you an use a free online service at ImageResize.org. Just upload a picture (or link to one online), crop and resize as you wish, then download the result to your computer. From there you can upload to Yale1969.org without trouble and with stunning results. Here is a 3-minute video demonstration showing you how to do this.
- Select/Create Photo
- If you have a digital photo, you can edit it and use it on this site. If you have only a physical copy of a photo — e.g., something from “back in the day” — you can digitize it by either using a scanner or a “poor man’s scanner,” namely a digital camera. Just put the photo, page or artifact on a table with a solid [white?] background, light it well, and then, looking squarely down on it, take a digital photo of it, avoiding shadows. Crop it, resize it and use it!
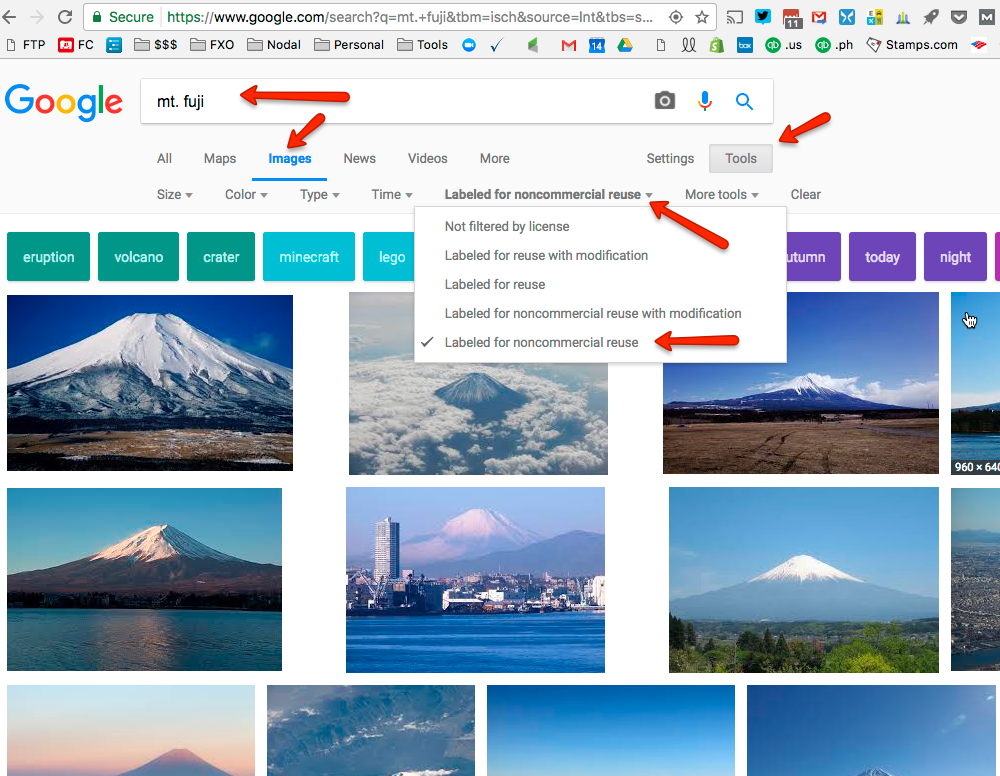
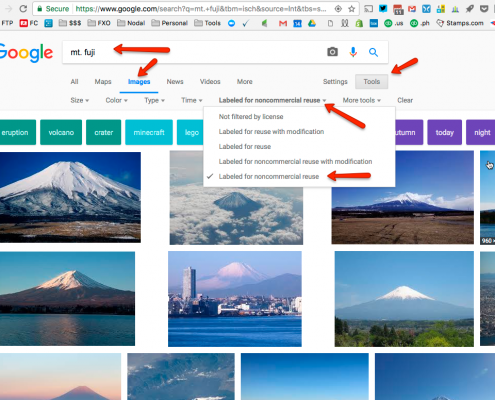 Another tip is to use Google Image search to find pictures you can use. Say you climbed Mt. Fuji and want to get a nice picture of Mt. Fuji for a post you are writing. Using “advanced search” on Google image search, you can limit the pictures shows to those that are “labeled for noncommercial reuse” and avoid any royalty payments. (Check to see if you need to give attribution, which you can do in a footnote if need be.).
- Add Media
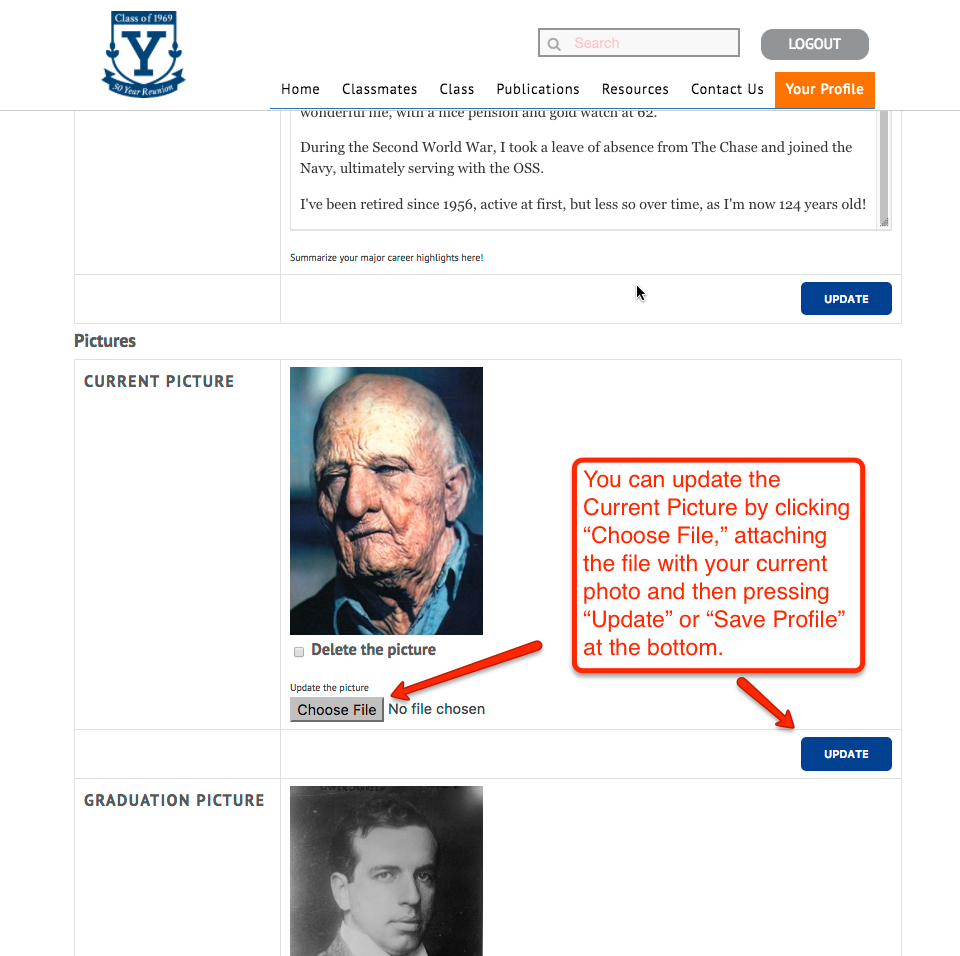
 (Click on thumbnail to see this choice.) If you have created a Current Photo for your profile, use the Edit Profile link and “attach” the file with that photo to the Current Photo field.
- If you want to add a picture, e.g., of your wife or kids, to the “Personal” section of your Profile, put the cursor where you want the picture to be inserted (typically at the beginning of a paragraph) and press the “Add Media” button. Upload the picture and add it to the post. Then click on the picture and play around with the editing controls that pop up. You can “float left” or “float right” with text wrap around. You can grab a corner of the picture and make it bigger or smaller. You can remove it if you want.
- The same things go when you create a ‘Memories and Observations’ post or any other full post on the site. Remember the truth of the web. Visuals speak volumes. Be sure to add pictures whenever you can.
[/av_textblock]